FeedBurner is a free feed product that be Google acquired in 2007, to help publishers analyze, optimize, promote, and earn advertising revenue from the RSS feeds of them.
FeedBurner has a lot of special effects in the design process of a web page, now so many utilities require new feed can run. So in this article, I will guide you register a blogspot FeedBurner for you.

In this article I will guide you how to register RSS feed. In the next article I will guide register Atom feed.
Part 1: How to register Feed Bunner from Google for Blogspot or website:
1.1 First you have to have a Gmail address (the email address to log into your blog). If you haven't already a Gmail account please register a Gmail account.
1.2 Once you have your gmail account you can access the following page to create feed:
1.3 At FeedBunner page, you login with your Gmail address.
Note: Log in with your Gmail Blog address.
1.4 After logging, in the Burn a feed right this instant textbox, you fill in your blog address -> click Next.
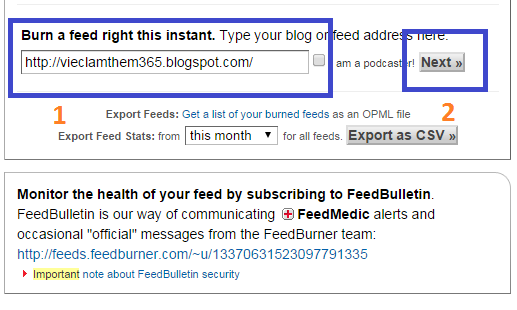
1.5 In the next page, there are 2 options: Atom or RSS, you click on the RSS -> continue click Next.
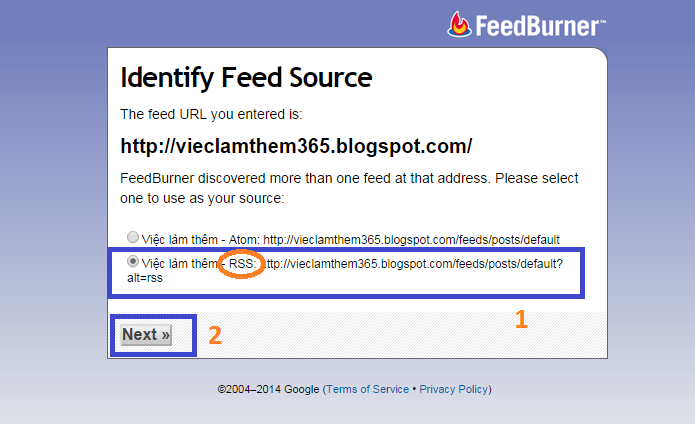
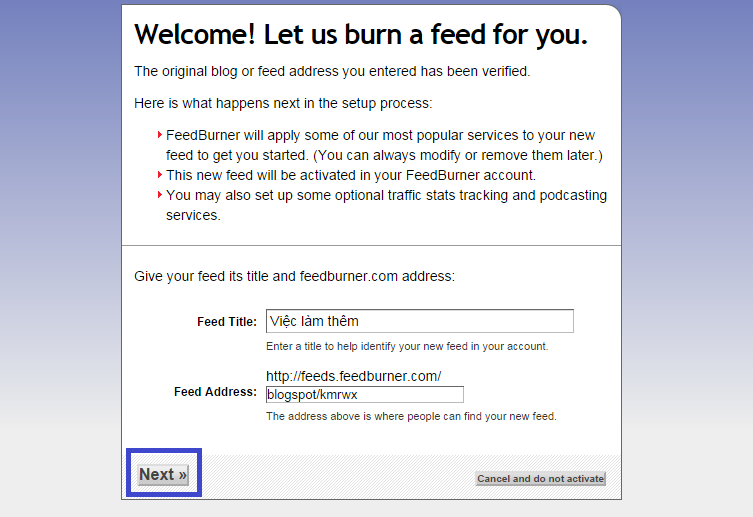
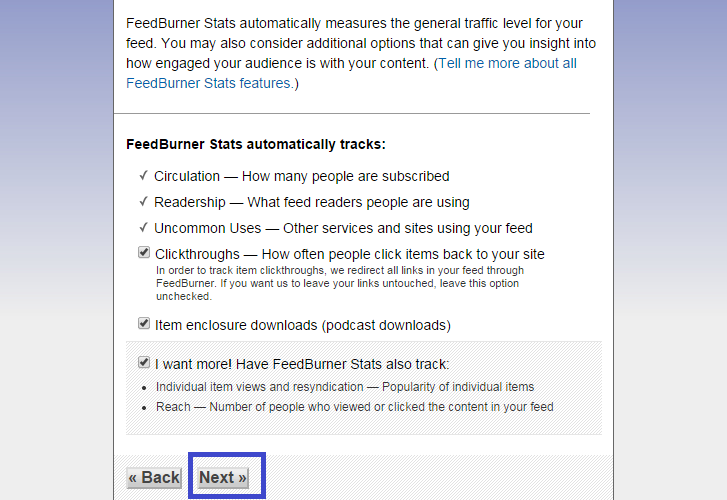
Click Next
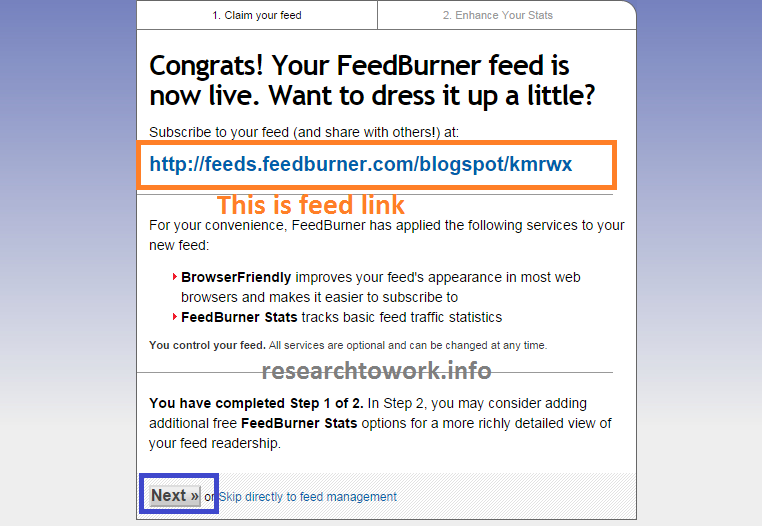
Click Next
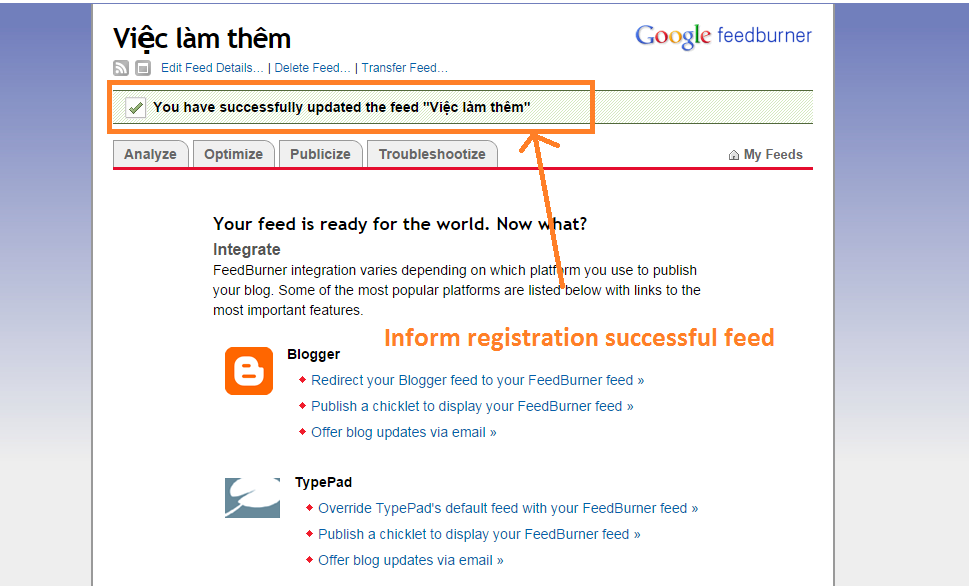
Part 2: Customized and get feed link:
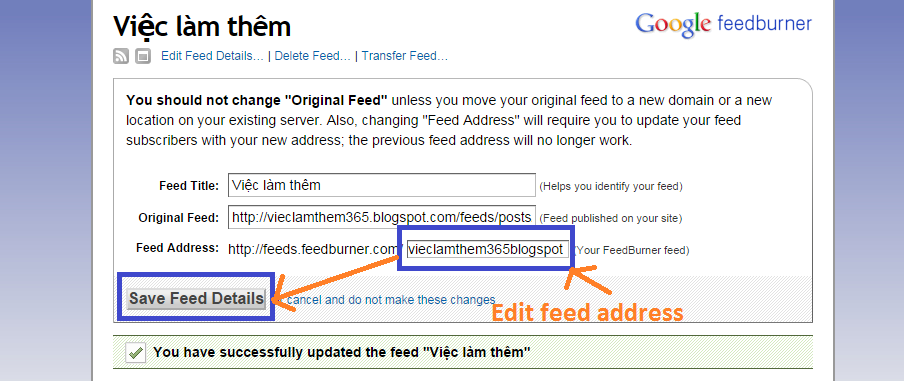
2.1 You click on Edit Feed Details... change feed address (name familiar) and click Save Feed Details.
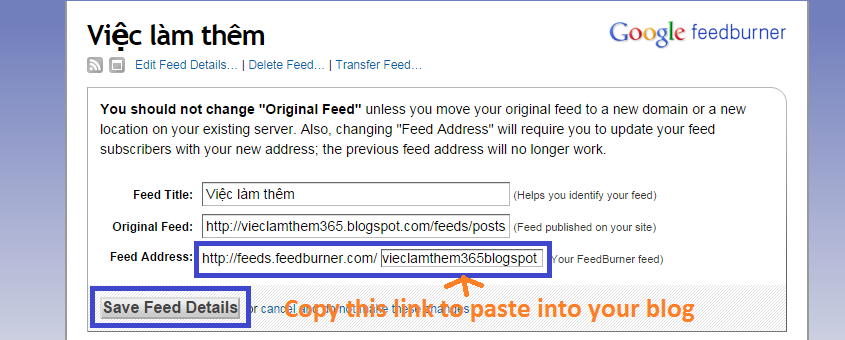
This is the feed link to paste into your blog:
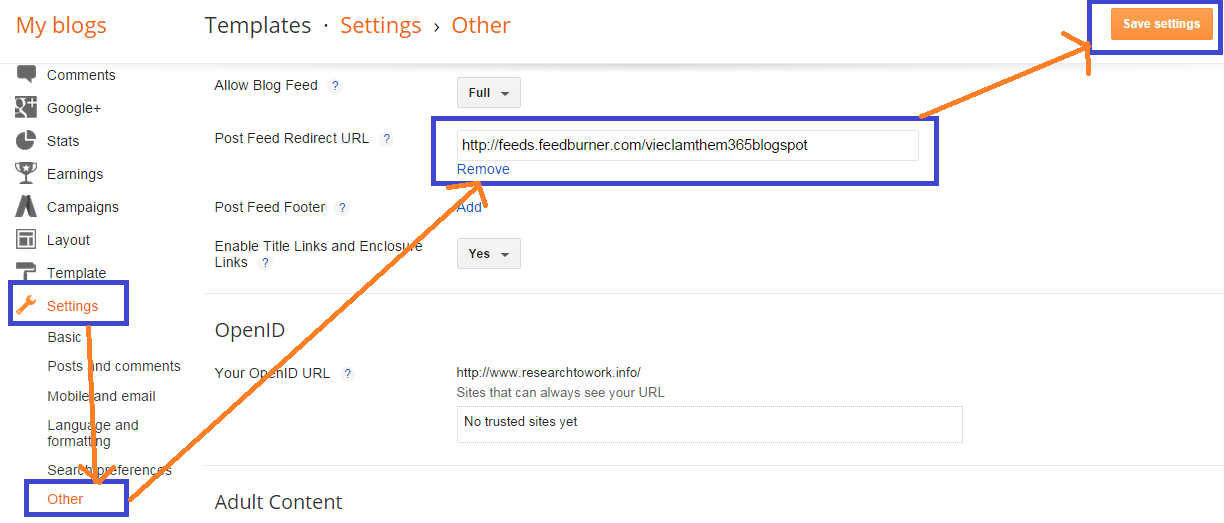
Part 3 : Setting Feed to Blog
3.1 You are logged in Blog.
3.2 Select Settings
3.3 Select Other
3.4 Enter feed address into Post Feed Redirect URL textbox.
3.5 Select Save Settings


0 comments